你在安装章节中,成功初始化了 co,并获得了一个 .co.toml 文件。
在 .co.toml 文件中,你可以自定义命令,功能非常强大。
一个简单的 Hello World 命令如下:
["say"]
commands = ["say", "speak", "echo"]
scripts = [
    "echo 'hello world'",
]
当你输入 co say 或 co speak 或 co echo 时,将会输出:
hello world你可以在 env 中定义额外的环境变量,这样你就不必考虑在不同系统下设置环境变量的脚本兼容性问题了。
["say"]
env = { SAY1 = "hello world 1", SAY2 = "hello world 2" }
commands = ["say", "speak", "echo"]
scripts = ["echo $SAY1"]你可以在 scripts 中写入多条脚本,例如:
["say"]
commands = ["say", "speak", "echo"]
scripts = [
    "echo 'hello world 1'",
    "echo 'hello world 2'",
    "echo 'hello world 3'",
]
脚本将按照顺序依次执行,一旦有任一命令执行失败,将会自动终止后续命令的执行。
每条脚本都将会是全新的上下文,例如在上条脚本中设置的变量在下一条会消失、使用 cd 命令切换的目录将重置。
脚本中可以使用模板语法,模板语法是被 <% %> 所包裹的内容,这部分内容可以插入合法的 JavaScript (NodeJs) 脚本,将会被执行。
如果添加等号,内容将会被输出,例如 <%= 1 + 1 %> 将会输出 2。
脚本支持模板语法,可通过 <%= yourVar %> 的方式插入变量。
默认的变量有所有的环境变量的值,以及两个特殊变量,args 和 argsArr:
args 是字符串,代表用户所输入的额外参数,如 co say hello world 中的 hello world。
argsArr 是其的数组形式,如 ["hello", "world"]。
例如,我们可以像下面这样,将用户输入的参数,来输出:
["say"]
commands = ["say", "speak", "echo"]
scripts = [
    "echo '<%= args %>'",
]脚本运行在 JavaScript (NodeJs) 环境中,因此支持任何 JavaScript 表达式,例如,你可以根据时间不同,来输出上午好或下午好:
["say"]
commands = ["say", "speak", "echo"]
scripts = [
    "echo '<%= new Date().getHours() > 12 ? '☀️Good morning!' : '🌖Good afternoon!' %>'",
]你甚至可以直接在里面编写 JavaScript 代码,实现流程控制。
<% %> 之间的代码将会被执行,而 <%= %> 之间的代码将会被输出。
["say"]
commands = ["say", "speak", "echo"]
scripts = [
    '''
    <% if (new Date().getHours() > 12) {%>
        echo '☀️Good morning!'
    <% } else {%>
        echo '🌖Good afternoon!'
    <% } %>
    '''
]
注意,以上代码示例中,使用了三个连续的引号 ''' 代表多行字符串,这是 TOML 的语法。
co 会自动删掉所有的换行,并删除每行前面的空格。你在编写脚本时,不需要担心换行符和空格的影响,可以自由换行。
goto 是一个特殊的脚本命令,它可以让你跳转到另一个执行。
在执行完成另一个命令后,如果此命令还有后续脚本没有执行完成,则继续执行后续的脚本。
["hello world"]
commands = ["hello-world", "hw"]
scripts = [
    "echo 'I want to say you:'",
    "goto:print 'hello world'",
    "echo ':)'",
]

["print"]
commands = ["print"]
scripts = [
    "echo <%= args %>",
]在 co 中引入模板语法,是为了尽可能地让配置可以兼容多个平台。如果你的团队中有些人用 Mac 而有些人用 Windows,这将会是一件很头疼的事情。
同时,也为了提高脚本的表达能力,让你可以在脚本中编写更加复杂的逻辑。编写 JavaScript 代码,比编写 shell 脚本,要简单得多,且可以在不同系统下正常运行。
但是模板语法并不是最好的选择,它没有高亮,也没有代码提示和语法检查,这将会让你在编写较复杂的脚本时,感到很不舒服。
如果你认为所要编写的脚步逻辑复杂到了使用模板语法感到吃力的情况时,请考虑是否使用你熟悉的脚本语言来编写脚本,然后通过 co 来执行这个脚本。
你可以通过 mixins 来载入其他的 toml 文件,mixins 命令固定写在名为 general 的组中。
其中,mixin 可以是一个相对路径,或是一个基于 home 目录的路径,也可以是一个绝对路径,或一个网络地址 (http:// 或 https://)。
["general"]
mixins = ["./foo.toml", "~/.co.toml", "/foo/bar/baz.toml"]

["say"]
commands = ["say", "speak", "echo"]
scripts = [
    "echo hello world",
]配置预设是 co 官方提供的一些配置,它能够简化你使用许多命令的方式。目前,我们为了 JavaScript 的各种包管理器提供了预设。
mixins 还可以加载配置预设,配置预设被嵌入在了 co 的二进制文件中,使用时以 co: 开头。
目前的配置预设有:
npm,yarn,pnpm,bun
例如,我在项目中使用 yarn,但我懒得记住 yarn 的命令,我可以通过引入 co 提供的 yarn 配置预设:
["general"]
mixins = ["co:yarn"]
现在,我只要输入 co i lodash,就可以安装 lodash 了。
在模板语法中,可以调用一些内置的方法,这些方法可以帮助我们更方便的编写脚本。
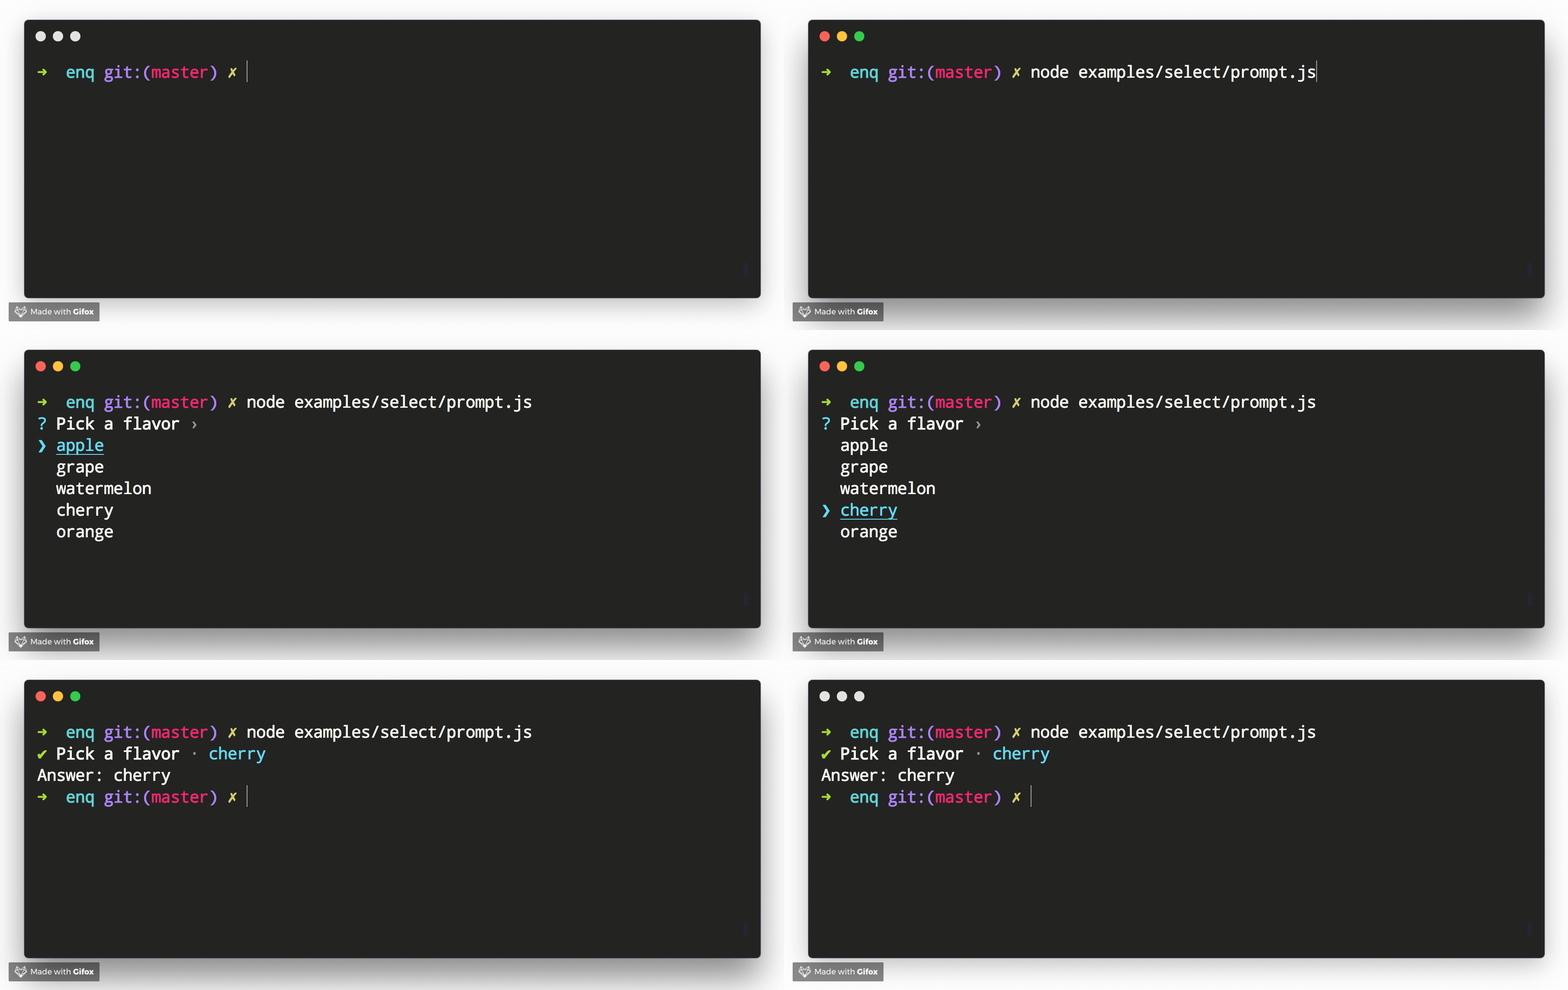
例如,可以轻松实现一个由用户自行选择的功能,效果如下:
😸 Command running on /root/workspace/co

? What fruits do you like? …
▸ Apple
  Banana
  Cherry
  Grape
Alias: exist
判断文件或目录是否存在
["exist"]
commands = ["exist"]
scripts = [
    '''
    echo '<%= exist(".co.toml") %>'
    ''',
]Alias: day
时间方法,可以以非常简单人性化的方式操作日期。文档参考 dayjs
["day"]
commands = ["day"]
scripts = [
    '''
    echo '<%= day().format('YYYY-MM-DD-T-HH-mm-ss') %>'
    ''',
]Alias: loadNodeModuleBin, lnb
执行 node_modules 中的本地包命令
编写 JavaScript 时,我们有时会安装一些带有命令的包,但我们有时又不想安装到全局。
typescript 包自带了名为 tsc 的命令,想调用这些局部的命令很简单。
例如,下面我们编写一个查找 tsc 命令所在路径的功能:
["where is tsc"]
commands = ["where-is-tsc", "wt"]
scripts = [
    "echo tsc in: <%= lnb('typescript', 'tsc') %>",
    # or
    # "echo tsc in: <%= loadNodeModuleBin('typescript', 'tsc') %>",
]Alias: interactive, ui, ia
交互式接受用户输入
可以实现单选、多选、Y/N 等丰富的交互式功能,基于 enquirer,可以查看文档来了解更多。
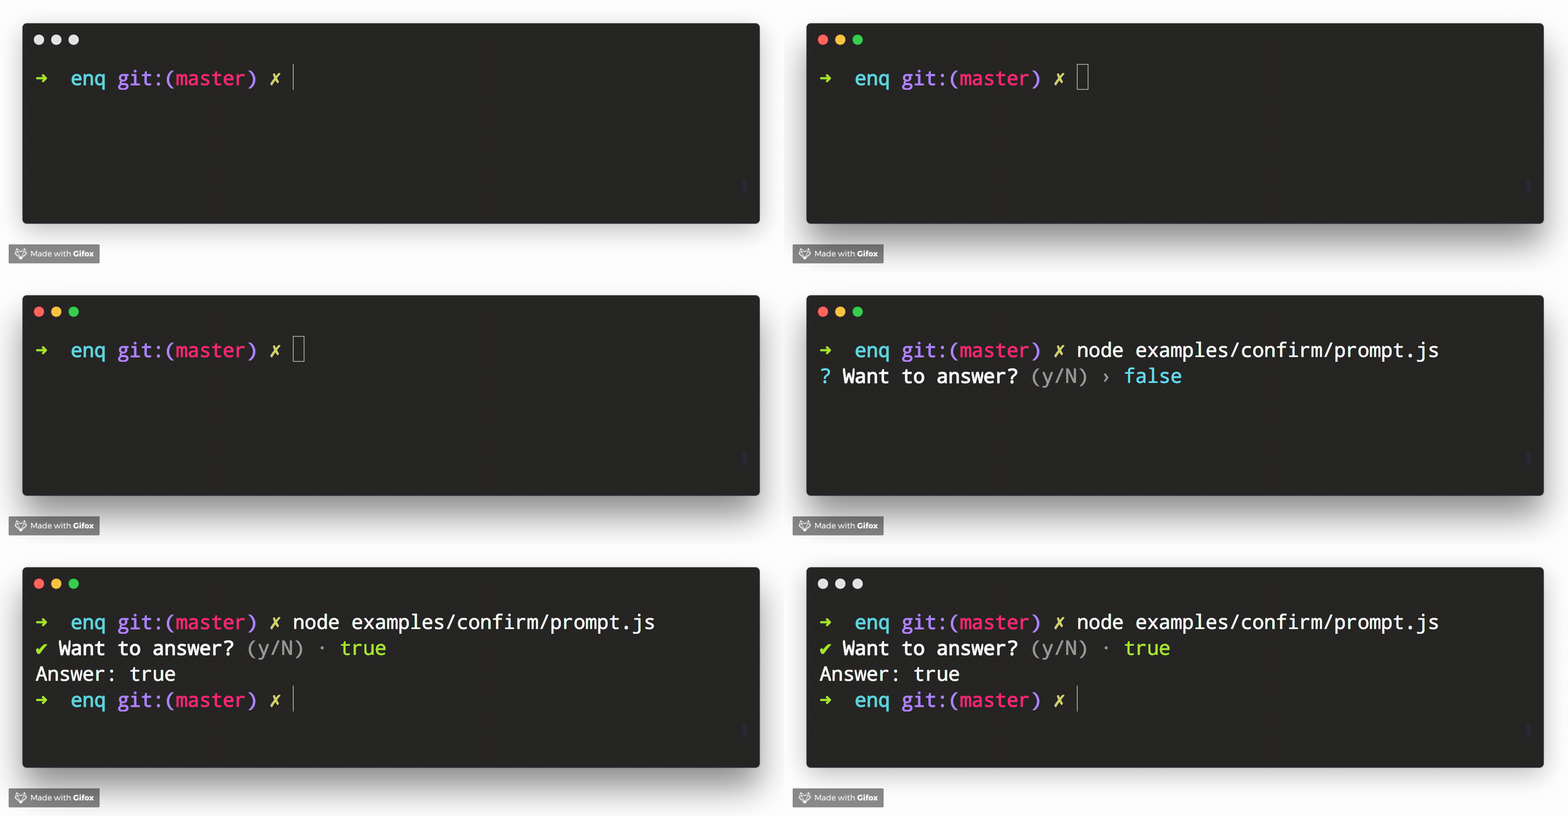
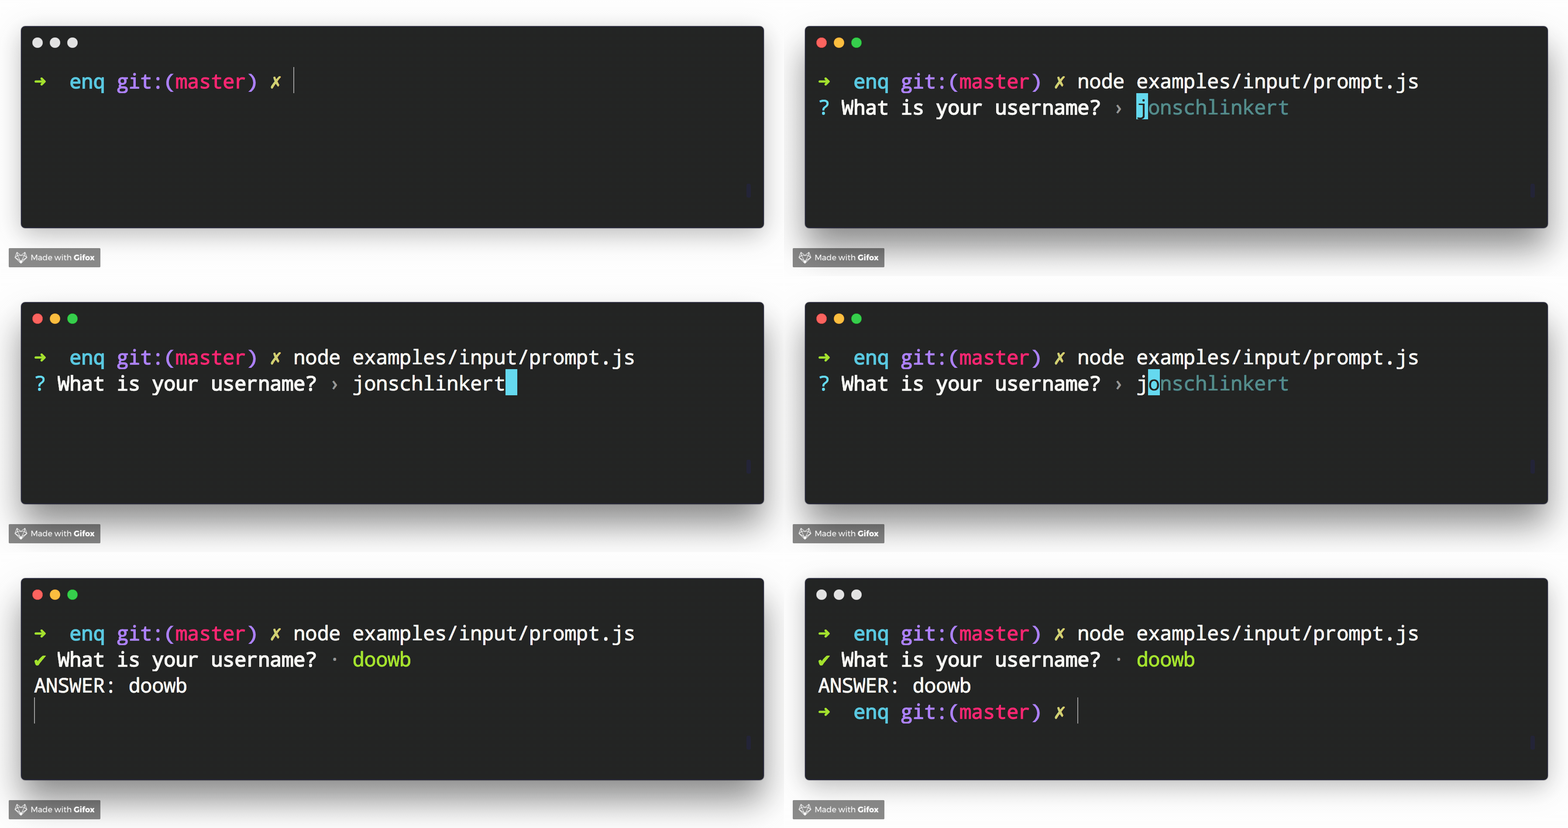
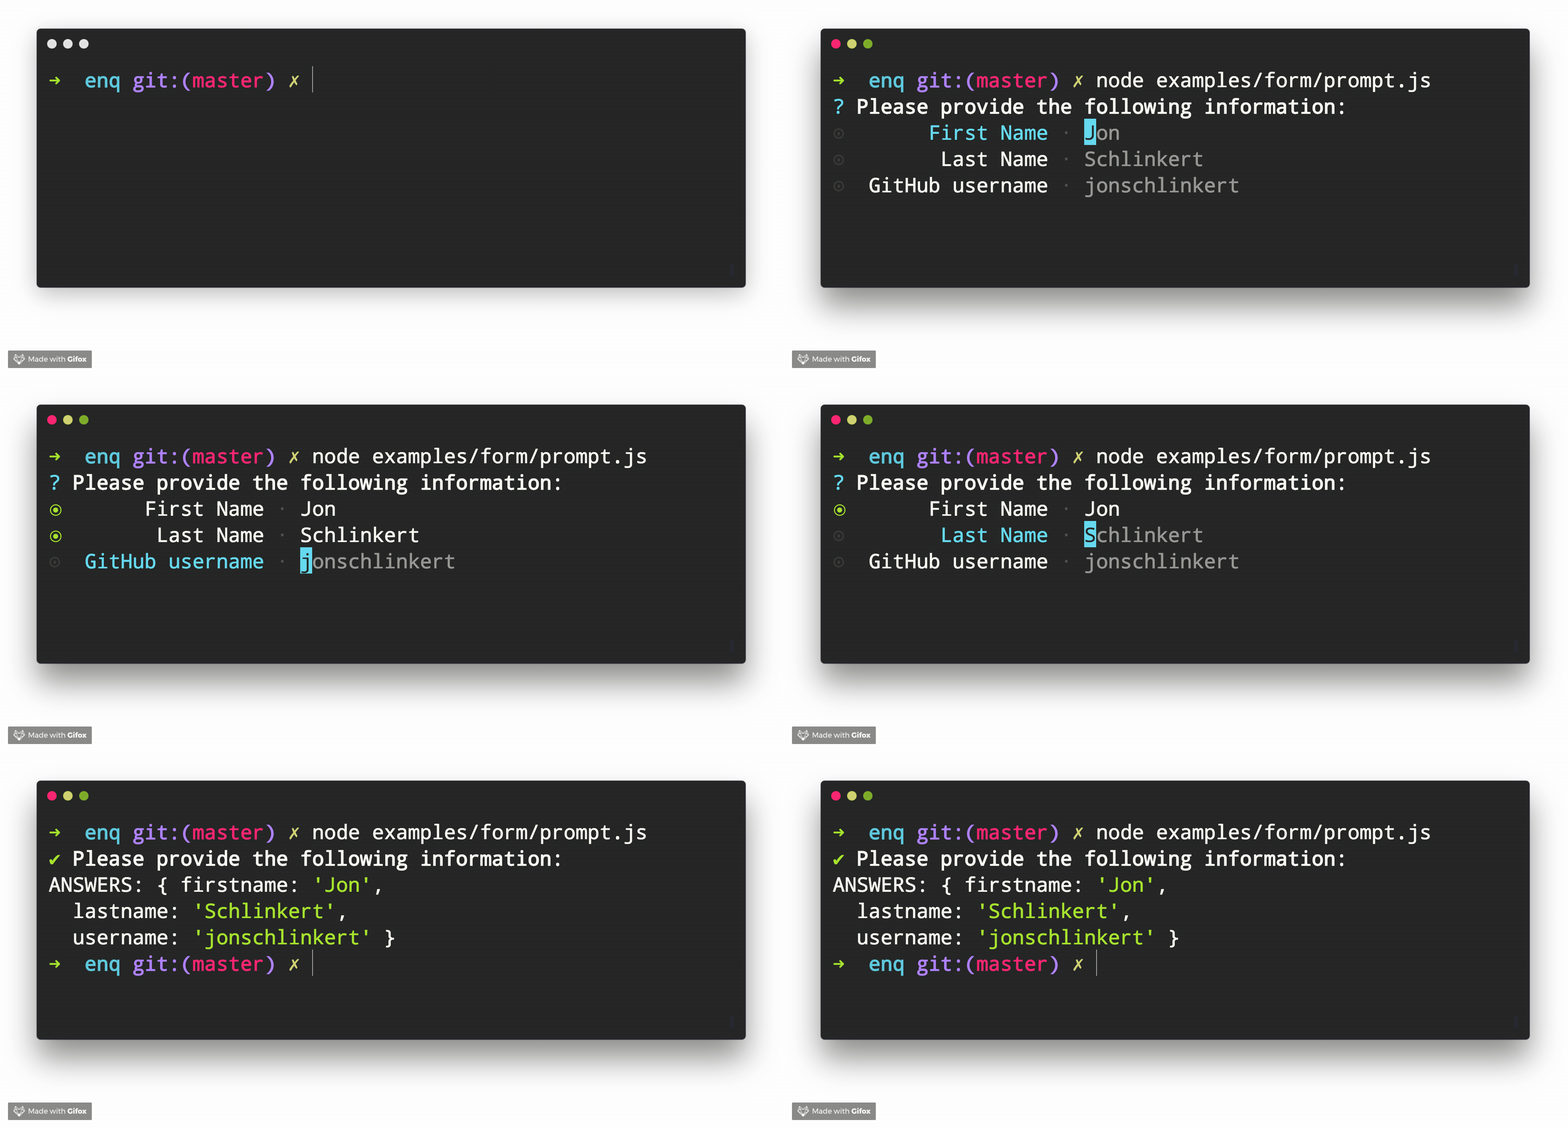
下面是一些常用的 Demo。
["interactive"]
commands = ["ui"]
scripts = [
    '''
    echo '<%= JSON.stringify(
            await ui({
            type: "select",
            message: "What fruits do you like?",
            choices: ["Apple", "Banana", "Cherry", "Grape"],
        })
    ) %>'
    '''
]["interactive"]
commands = ["ui"]
scripts = [
'''
echo '<%= JSON.stringify(
await ui({
type: "confirm",
message: "This operation is irreversible, are you sure you want to execute it?",
})
) %>'
'''
]["interactive"]
commands = ["ui"]
scripts = [
'''
echo '<%= JSON.stringify(
await ui({
type: "input",
message: 'What is your username?',
initial: 'jonschlinkert'
})
) %>'
'''
]["interactive"]
commands = ["ui"]
scripts = [
'''
echo '<%= JSON.stringify(
await ui({
type: "form",
message: 'Please provide the following information:',
choices: [
{ name: 'firstname', message: 'First Name', initial: 'Jon' },
{ name: 'lastname', message: 'Last Name', initial: 'Schlinkert' },
{ name: 'username', message: 'GitHub username', initial: 'jonschlinkert' }
]
})
) %>'
'''
]Alias: camel
转换为驼峰命名 (首字母小写)
["camel"]
commands = ["camel"]
scripts = [
    "echo '<%= camel('hello world') %>'",
    "echo '<%= camel('hello-world') %>'",
    "echo '<%= camel('hello_world') %>'",
    "echo '<%= camel('hello.world') %>'",
    "echo '<%= camel('helloWorld') %>'",
    "echo '<%= camel('HelloWorld') %>'",
]Alias: hump
转换为驼峰命名 (首字母大写)
["hump"]
commands = ["hump"]
scripts = [
    "echo '<%= hump('hello world') %>'",
    "echo '<%= hump('hello-world') %>'",
    "echo '<%= hump('hello_world') %>'",
    "echo '<%= hump('hello.world') %>'",
    "echo '<%= hump('helloWorld') %>'",
    "echo '<%= hump('HelloWorld') %>'",
]Alias: hyphen
转换为中划线连字符命名
["hyphen"]
commands = ["hyphen"]
scripts = [
    "echo '<%= hyphen('hello world') %>'",
    "echo '<%= hyphen('hello-world') %>'",
    "echo '<%= hyphen('hello_world') %>'",
    "echo '<%= hyphen('hello.world') %>'",
    "echo '<%= hyphen('helloWorld') %>'",
    "echo '<%= hyphen('HelloWorld') %>'",
]Alias: underline
转换为下划线命名
["underline"]
commands = ["underline"]
scripts = [
    "echo '<%= underline('hello world') %>'",
    "echo '<%= underline('hello-world') %>'",
    "echo '<%= underline('hello_world') %>'",
    "echo '<%= underline('hello.world') %>'",
    "echo '<%= underline('helloWorld') %>'",
    "echo '<%= underline('HelloWorld') %>'",
]Alias: readJSON
读取 JSON 文件
["readJSON"]
commands = ["read-json"]
scripts = [
    '''
    echo '<%= JSON.stringify(
        readJSON('package.json')
    ) %>'
    ''',
]Alias: readTOML
读取 TOML 文件
["readTOML"]
commands = ["read-toml"]
scripts = [
    '''
    echo '<%= JSON.stringify(
        readTOML('.co.toml')
    ) %>'
    ''',
]Alias: readENV
读取 .env 文件的内容 (值始终为字符串,不会处理引号)
["readENV"]
commands = ["read-env"]
scripts = [
    '''
    echo '<%= JSON.stringify(
        readENV('.env')
    ) %>'
    ''',
]为了编写的脚本尽可能地可以跨平台,在 Windows 下,对 PowerShell 进行了特殊的兼容处理。
通常,我们希望可以在一条脚本中运行多条命令,且命令在遇到错误时自动停止。因此,我们经常编写这样的脚本:
cd ~ && cd .ssh && cat id_rsa.pub但在 PowerShell 中,命令遇到错误将不会停止,且不可以使用 && 符号来运行多条连续的命令。
在 co 中,自动对这种情况做了兼容处理。如果你在 Windows 下的 co 中,原封不动地执行上面的脚本,那么将正常工作。它实际上会被转换成下面的命令来执行:
$ErrorActionPreference = "Stop"; cd ~; cd .ssh; cat id_rsa.pub;在 co 中,可以使用 Platform 模板方法来根据不同平台,返回不同的内容。
["platform"]
commands = ["plt"]
scripts = [
'''
    echo '
        To delete all your data (VERY DANGEROUS), you can try running:
        rm <%= plt('-rf', '-Recurse -Force') %> ./*
    '
'''
]


