
![]()
![]()
![]()
![]()
![]()
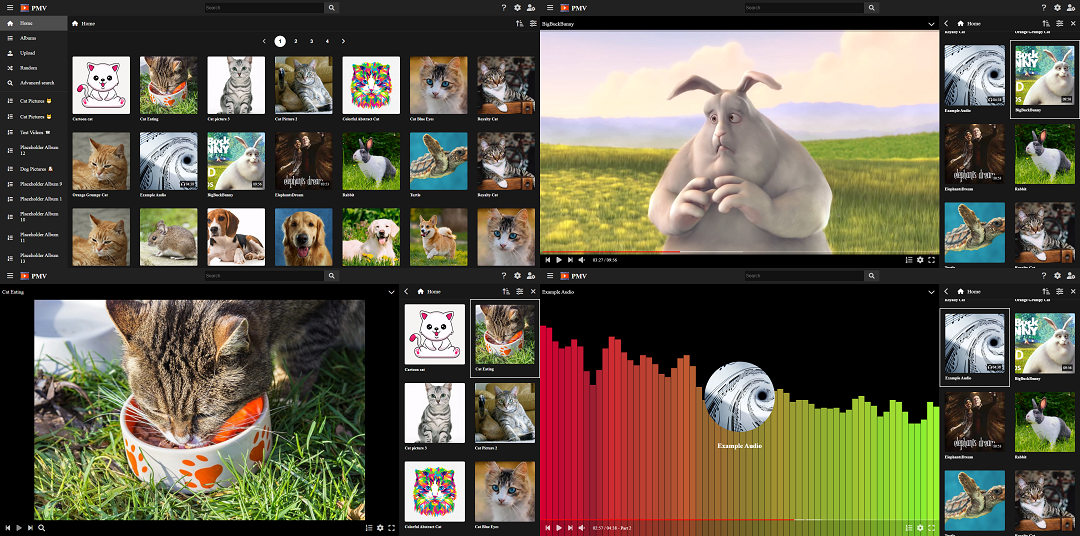
Self-hosted web application to store media files (video, audio and pictures) in an encrypted storage, and visualize them using a web browser.
- 🌐 PersonalMediaVault product website
- 📣 Announcements
- 🐛 Report a bug
- ☣️ Report a vulnerability
- 💡 Suggest a new feature
- 🙏 Need help? Ask a question
- Support for videos, audios and pictures.
- Web interface: The project provides a Web interface, allowing the access to the vault from multiple devices and operating systems.
- Encrypted and easy to back-up storage: The vault is encrypted using the user's password, and is stored in files in a data folder. It's possible to make backups of the vault just by copying the folder, ideal for tools like rsync. This project also provides its own backup tool for doing that.
- Indexed tags: Each media asset can be tagged, so the user can search for it with a tag based search system.
- Albums: Media files can be sorted using albums.
- Media encoding: Media files are encoded into multiple formats in order to allow the playback from multiple browsers. For videos and pictures, they can also be resized into multiple resolutions for different kind of devices.
- Automated thumbnail generation: When videos or images are uploaded, a default thumbnail is generated. You can change the default thumbnail at any moment after the upload.
- Subtitles support: SubRip subtitles can be added to your videos and audios.
- Multiple audio track support: Videos can have multiple audio tracks, usually for multi-language audio.
- Video timeline previews: Get previews while hovering the video timeline.
- Video timeline slices: Divide long videos in sections to quickly navigate through them.
- Image annotations: Add comments to images.
- Attachments: Upload any file attached to your media to preserve them in the encrypted vault. This can be used to preserve a copy of the raw media file, before the encoding.
Running the vault in an isolated container is the most secure way of running it, gives access to all the features and allows for a fine-grained configuration.
However, this may be a bit complex for non technical users. So, if you only need a local vault, go to the Installation packages section instead.
Note: If you wish to enable AI features, use the compose file present in the packages/docker-compose-with-ai folder instead.
You will need a container management system, for example Docker or Podman. In the documentation, Docker commands are being used, so, if you are using Podman, make sure to replace docker for podman before running them.
You can find the official image of the project uploaded to Docker Hub and GitHub Packages.
To create a vault setup, fist create a compose file (docker-compose.yml):
File contents (docker-compose.yml):
services:
  pmvd:
    hostname: "pmvd"
    image: "asanrom/pmv"
    ports:
      - "${VAULT_PORT}:8000"
    restart: unless-stopped
    volumes:
      - ${VAULT_PATH:-./vault}:/vault
      - ${VAULT_SSL_PATH:-./ssl}:/ssl:ro
    environment:
      - USING_PROXY=${USING_PROXY:-NO}
      - VAULT_INITIAL_USER=${VAULT_INITIAL_USER:-admin}
      - VAULT_INITIAL_PASSWORD=${VAULT_INITIAL_PASSWORD:-changeme}
      - SSL_CERT=${SSL_CERT:-}
      - SSL_KEY=${SSL_KEY:-}
    command: --daemon
      --clean
      --port 8000
      --skip-lock
      --vault-path /vault
      --cache-size ${VAULT_CACHE_SIZE:-1024}
      ${VAULT_EXTRA_OPTIONS:-}
After that, create in the same folder an environment file (.env) for the configuration parameters in the compose file.
File contents (.env):
####################################
# PersonalMediaVault configuration #
####################################

# Listening port
VAULT_PORT=8000

# Path where the vault will be stored
VAULT_PATH=./vault

# SSL (recommended)
#
# Running the vault with HTTP is the most secure option
# Obtain a key and a certificate for your domain
#
# Set VAULT_SSL_PATH to the path where the key and the certificate are stored
# This path will be mapped to /ssl in the container
# Set SSL_KEY and SSL_CERT to the key and certificate chain files respectively
# The files must be in the /ssl path (eg: /ssl/certificate.pem) and in PEM format

VAULT_SSL_PATH=./ssl

#SSL_KEY=/ssl/key.pem
#SSL_CERT=/ssl/certificate.pem

# Reverse proxy
#
# Sometimes is better to use a reverse proxy (line NGINX)
# as the frontend and forward the requests to the daemon
#
# If you are using it, set USING_PROXY to YES in order for
# the daemon to change the way it resolves the IP addresses of clients

USING_PROXY=NO

# Initial vault user
#
# If the vault has no users, an initial user will be created
#
# Set VAULT_INITIAL_USER and VAULT_INITIAL_PASSWORD
# for the username and password respectively
#
# Make sure to change them the first time you log into the vault.

VAULT_INITIAL_USER=admin
VAULT_INITIAL_PASSWORD=changeme

# Cache size
# You can modify it to accelerate the read speed
# but will also result in higher memory usage
# The recommended value is 1024

VAULT_CACHE_SIZE=1024

# Extra options
#
# You can set the following extra options,
# separating them with spaces:
#
#   --log-requests - Enables request logging
#   --debug - Enables debug logging (useful for troubleshooting)
#   --fix-consistency - Fixes vault consistency at startup (takes some time)
#   --recover - Recovers non-indexed media assets.

VAULT_EXTRA_OPTIONS=--log-requests
Read the environment file in order to configure the file. Then, you can start the vault:
docker compose up -dIn case you want to upgrade the image, run:
docker compose pull
docker compose up -d
In case you want to stop it, run:
docker compose downWe offer several installation packages depending on the operating system you are using. You can find those packages in the Releases section of the repository.
This method is ideal for non-technical users, as a graphical launcher will be installed to run the vault without any commands.
Read the sections below for installation instructions.
For Windows, download the MSI installer (PersonalMediaVault-{VERSION}-x64.msi) from Releases.
Run the installer and and everything will be set up for the application to work.
After it's installed, create an empty folder to store your media vault and right click it. You should see a new option "Open with PersonalMediaVault". Click it to run the vault launcher.
For Debian-based Linux distributions, download the DEB package (personalmediavault_{VERSION}_amd64.deb) from Releases.
Install the package, with apt or with your graphical package manager.
You can also install it directly from the PPA repository (built automatically with GitHub actions):
# Download the public key
curl -s --compressed "https://agustinsrg.github.io/PersonalMediaVault/KEY.gpg" | gpg --dearmor | sudo tee /etc/apt/trusted.gpg.d/pmv.gpg >/dev/null

# Add the APT list file
sudo curl -s --compressed -o /etc/apt/sources.list.d/pmv.list "https://agustinsrg.github.io/PersonalMediaVault/pmv.list"

# Update APT lists
sudo apt update

# Install the package
sudo apt install personalmediavault
After it's installed, you can run the launcher with pmv /path/to/vault or the graphical launcher by searching for "PersonalMediaVault" in your application menu.
For Fedora-based Linux distributions, download the RPM package (personalmediavault-{VERSION}.x86_64.rpm) from Releases.
Install the package, with dnf or with your graphical package manager.
After it's installed, you can run the launcher with pmv /path/to/vault or the graphical launcher by searching for "PersonalMediaVault" in your application menu.
For Arch-based Linux distributions, download the PKG.TAR.ZST package (personalmediavault-{VERSION}-x86_64.pkg.tar.zst) from Releases.
Install the package, with pacman:
sudo pacman -U personalmediavault-{VERSION}-x86_64.pkg.tar.zstAfter it's installed, you can run the launcher with pmv /path/to/vault or the graphical launcher by searching for "PersonalMediaVault" in your application menu.
For any other Linux distribution, you can download the TAR.GZ package (personalmediavault_{VERSION}_amd64.tar.gz) from Releases.
Uncompress it, and run the installation script (install.sh) with administration privileges:
sudo ./install.shAfter it's installed, you can run the launcher with pmv /path/to/vault or the graphical launcher by searching for "PersonalMediaVault" in your application menu.
If you are using a Linux distribution, and KDE as your desktop environment, you can get the same context menu options to open vaults that are installed in the Windows package.
Create the file ~/.local/share/kio/servicemenus/pmv-open.desktop with the following contents:
File contents (pmv-open.desktop):
[Desktop Entry]
Name=Open with PersonalMediaVault
Type=Service
ServiceTypes=KonqPopupMenu/Plugin
MimeType=inode/directory
Actions=openWithPmv

[Desktop Action openWithPmv]
Name=Open with PersonalMediaVault
Name[es]=Abrir con PersonalMediaVault
Terminal=false
Icon=pmv
StartupWMClass=pmv
Exec=pmv-gui .
If you prefer to use the console launcher instead, use the following desktop entry:
File contents (pmv-open-console.desktop):
[Desktop Entry]
Name=Open with PersonalMediaVault (Console)
Type=Service
ServiceTypes=KonqPopupMenu/Plugin
MimeType=inode/directory
Actions=openWithPmvConsole

[Desktop Action openWithPmvConsole]
Name=Open with PersonalMediaVault (Console)
Name[es]=Abrir con PersonalMediaVault (Consola)
Terminal=false
Icon=pmv
StartupWMClass=pmv
Exec=konsole --separate -e 'pmv .'
- Backend: Manages the vault, encodes and stores the media files and provides a HTTP API for clients to access it.
- Frontend: Uses the HTTP API to access the vault, providing a web interface to the user.
- Backup tool: Tool to make backups of media vaults (copies the new files and replaces the old ones, using the last modified date).
- Launcher: CLI program to launch the web app. This component is made in order to make it easier to use in local, when you do not have the backend configured as a system service.
- Installation Packages: Collection of installation packages for multiple operating systems.
This is a personal project developed with the goal of making a media management tool that has a similar web interface to YouTube, while keeping the media files encrypted in disk.
Why encryption?: When storing your personal pictures, videos or audio recordings, if you store them unencrypted in your computer, any malware that is able to infect your device will be able to easily get them from the file system. By encrypting them, it makes harder for those media files to be stolen. Also, by being encrypted, you can easily make backups of them in cloud storage services like Google Drive, without giving Google the ability to peek into your personal media files.
Why a web application?: By making it a web application, its usage becomes very flexible. You can run the backend in a computer in your LAN or a remote server and you are able to use the app from all the devices connected to the Internet without any extra installation. Also, web interfaces are easier to develop to work in multiple devices and they offer standard features already implemented that are required for the app, like the video player.
This project is under the MIT License.