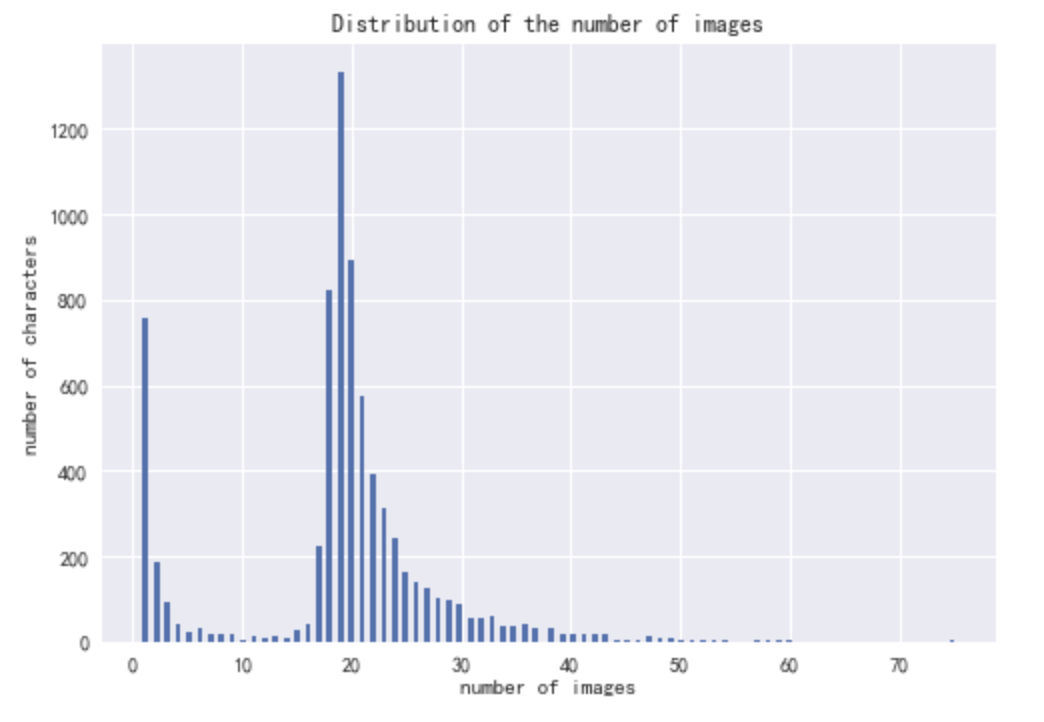
We collected 138,499 images of Chinese calligraphy characters written by 19 calligraphers from the Internet, which cover 7328 different characters in total.
As seen in the following figures, most characters have less than 40 different images and the image sizes also vary a lot. You can see the code for a simple EDA in eda.ipynb notebook.

We have prepared two datasets:
-
The first dataset has a folder for each character (JPG). You can download the dataset from here (747M).
-
The second dataset separates images according to each calligrapher (GIF). You can download the dataset from here (289M).
We have created the dataloader for both Tensorflow 2 and PyTorch to facilitate image analysis. You can run the code as follows:
- Download data using the links above.
- Unzip the dataset in the
datafolder, which is in the same directory asdataset-tf.pyanddataset-pytorch.py. The directory tree should be:
├── ...
├── data
│   ├── chinese-calligraphy-dataset
│   │   ├── ㄚ
│   │   ├── 一
│   │   ├── 丁
│   │   ├── 七
│   │   ├── 万
│   │   └── ...
│   └── label_character.csv
├── dataset-pytorch.py
├── dataset-tf.py
└── ...- TensorFlow 2.3
The same code is in the dataset-tf.py, you can run python dataset-tf.py to see the results.
from dataset-tf import CalligraphyDataset
import matplotlib.pyplot as plt

batch_size = 8
sample_batch_num = 4
dataset = CalligraphyDataset(data_dir='./data/chinese-calligraphy-dataset/',
                            character_csv='./data/label_character.csv',
                            batch_size=8,
                            repeat=False,
                            shuffle=False)

plt.figure()
plt.rcParams['font.sans-serif']=['SimHei']

for i_batch, (images, labels) in enumerate(dataset.dataset):
    if i_batch >= sample_batch_num:
        break

    labels = np.array([dataset.characters[item.numpy().decode('utf-8')] for item in labels])
    images = images.numpy()
    print(i_batch, images.shape, labels.shape)

    for i in range(images.shape[0]):
        ax = plt.subplot(sample_batch_num, batch_size, i_batch * batch_size + i + 1)
        ax.axis('off')
        ax.set_title(list(dataset.characters.keys())[labels[i]])
        plt.imshow(images[i])

plt.show()- Pytorch
The same code is in the
dataset-pytorch.py, you can runpython dataset-pytorch.pyto see the results.
from dataset-pytorch import CalligraphyDataset, ToTensor
import torch
import matplotlib.pyplot as plt

batch_size = 8
sample_batch_num = 4

dataset = CalligraphyDataset(
    data_dir='./data/character/',
    character_csv='./data/label_character.csv',
    # transform=torchvision.transforms.Compose([ToTensor()])    # uncomment this line to transform numpy to tensor
)

data_loader = torch.utils.data.DataLoader(dataset, batch_size=8, shuffle=True)

plt.figure()
plt.rcParams['font.sans-serif']=['SimHei']
for i_batch, sample_batched in enumerate(data_loader):
    if i_batch == sample_batch_num:
        break

    print(i_batch, sample_batched['image'].size(),
        sample_batched['character'].size())

    for i in range(len(sample_batched['image'])):
        ax = plt.subplot(sample_batch_num, batch_size, i_batch * batch_size + i + 1)
        ax.axis('off')
        ax.set_title(list(dataset.characters.keys())[int(sample_batched['character'][i][0])])
        plt.imshow(sample_batched['image'][i])

plt.show()